Here in this tutorial I'm going to take you for a ride to the beautiful world of smoke effects created on Photoshop using Filter, Brush and other tools.
Step 1
Create a new document in Photoshop. Set its Width and Height
to 297 mm x 210 mm and click Create.
Step 2
Place the below image which we are going to create a smoke
effect means we are going to make it hot.
Step 3
Create a new layer and grab the Pen Tool (P) to draw the
path of the smoke.
Step 4
Now we are going to make magic.
Go to Filter > Render > Flame to render the base
texture for smoke effect.
I used the below values for the effect you just play with
the values (Basic & Advanced) and create your own shape.
Go to Paths > Deselect to deactivate the path selection
Step 5
Press Cmd/Ctrl + Shift + U to de saturate the image.
Change the Blend mode to Screen.
Step 6
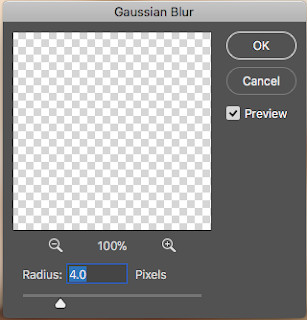
Go to Filter > Blur > Gaussian Blur to blur the smoke
effect.

Add clip mask to the layer to create the feather effect in the end.

Select the brush tool and make sure the foreground color is
black. Opacity: 27 %

Brush the base to create a feather effect and the place
which you want to be lighten.
Change layer opacity to 60%.


Amazing, this is a great Post, Clipping Path Associate, is one of the best clipping path
ReplyDeleteservice provider around the world.
You should mainly superior together with well-performing material, which means that see it: Bongs and Water Bongs
ReplyDeletewhat hapoens if a vape too much cbd oil This is such a great resource that you are providing and you give it away for free. I love seeing blog that understand the value of providing a quality resource for free.
ReplyDeleteYou’ve got some interesting points in this article. I would have never considered any of these if I didn’t come across this. Thanks!. onlinesmoke shop
ReplyDeleteYou there, this is really good post here. Thanks for taking the time to post such valuable information. Quality content is what always gets the visitors coming. popular types of vaping devices
ReplyDelete